Effective PIC Debugging: MPLAB X & ICD Integration
Comprehensive MPLAB X & XC8 Compiler Setup Tutorial
In this tutorial, we will explore the essential steps to set up MPLAB X Integrated Development Environment (IDE) and the XC8 Compiler, which together form a powerful foundation for creating C-based applications on PIC microcontrollers Introduction to PIC: Exploring the Basics of Microcontroller ArchitectureExplore the core principles of PIC microcontroller architecture, including Harvard design, RISC processing, and efficient memory organization.. By the end of this guide, you will have a fully functional environment ready to compile and run simple programs on your PIC device.
Overview of MPLAB X and XC8🔗
- MPLAB X is Microchip’s official IDE for PIC microcontrollersIntroduction to PIC: Exploring the Basics of Microcontroller ArchitectureExplore the core principles of PIC microcontroller architecture, including Harvard design, RISC processing, and efficient memory organization. and other Microchip devices. It provides:
- Project Management: Organize source code, device settings, and library files under one environment.
- Integrated Tools: Access to compilers (like XC8) and hardware debuggers in one place.
- Debugging
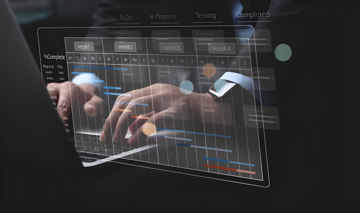
 Debugging and Troubleshooting Techniques with ICD and MPLAB XMaster real-time PIC microcontroller debugging with MPLAB X and ICD tools. Discover breakpoint setup, variable inspection, and performance techniques. Interface: Step-by-step code execution, variable inspection, and breakpoints.
The XC8 Compiler is Microchip’s C compiler designed for 8-bit PIC microcontrollersIntroduction to PIC: Exploring the Basics of Microcontroller ArchitectureExplore the core principles of PIC microcontroller architecture, including Harvard design, RISC processing, and efficient memory organization.. It converts your C programs into machine code that runs on various PIC devices.
Installation Steps🔗
Download and Install MPLAB X
1. Visit the Microchip Website: Go to Microchip’s Official Page.
2. Follow the Installer: Run the installer and follow the on-screen prompts to accept license terms, choose destination folder, and install the software.
3. Initial Launch: After installation, open MPLAB X. The first launch might prompt you to install available updates-allow them to keep your environment up to date.
Download and Install the XC8 Compiler
1. Compiler Download: Navigate to Microchip’s XC Compilers Page to download the XC8 Compiler.
2. Choose the Appropriate Version: Most users select the free version (which is typically adequate for learning and standard projects).
3. Installation Wizard: Run the downloaded installer, agree to terms, and confirm that it automatically integrates with MPLAB X.
Tip: If you install XC8 first, MPLAB X will detect it automatically upon installation, or you can specify the path to the XC8 compiler afterward in Tools > Options > Embedded > Build Tools.
Configuring a New Project🔗
Once MPLAB X is up and running, follow these steps to create and configure a basic project that uses the XC8 Compiler.
1. Launch MPLAB X: Double-click the MPLAB X icon on your desktop or open it from your applications folder.
2. New Project Wizard: Go to File > New Project. In the dialog that appears, choose Microchip Embedded > Standalone Project, then click Next.
3. Select a Device: Specify the PIC microcontrollerIntroduction to PIC: Exploring the Basics of Microcontroller ArchitectureExplore the core principles of PIC microcontroller architecture, including Harvard design, RISC processing, and efficient memory organization. you want to program (e.g., PIC16Fxxxx).
4. Tool Selection: If you have a hardware debugger or programmer (e.g., PICkit™), select it here. Otherwise, you may choose the simulator for practice.
5. Compiler Toolchain: Select XC8 as your compiler. If more than one toolchain is installed, pick the correct version from the drop-down.
6. Project Name and Location: Enter a name (for example, MPLAB_XC8_Intro) and choose a folder to store your project, then click Finish.
At this point, MPLAB X creates the new project and sets up the infrastructure for developing your code with the XC8 compiler.
Project Structure in MPLAB X🔗
A newly created project often contains the following folders:
| Folder | Description |
|---|---|
| Header Files | Place your .h files here. These files usually contain function prototypes and definitions. |
| Source Files | Place your .c files here. This is where the main logic of your program resides. |
| Important Files | Contains project configuration information such as compiler settings and resource links. |
MPLAB X will also create one or more Logical Folders which do not always match the physical file system structure but help you stay organized within the IDE.
Writing and Compiling a Simple C Program🔗
Let’s write a minimal C program to test our MPLAB X and XC8 setup. We will keep this example purposely simple-just a basic main function that initializes the microcontroller and enters an infinite loop.
1. Add a C Source File: Right-click on the Source Files folder in the Projects pane. Select New > C Main File.
2. Name Your File: For instance, main.c.
3. Edit the Code: Below is a simple example that includes the main function:
#include <xc.h>
// TODO: Add your microcontroller's configuration bits here, if needed.
int main(void)
{
    // Example: Basic initialization steps
    // (We keep it generic to avoid overlapping with advanced peripheral topics)
    while(1)
    {
        // Main loop: Put your recurring code here
    }
    return 0;
}
4. Build Your Project: Click the Build (hammer icon) on the toolbar or press F11. MPLAB X will invoke the XC8 Compiler and generate the necessary output files.
5. Check the Output: Under the Output window, you will see build messages. A successful build ends with “BUILD SUCCESSFUL” (or a similar confirmation).
Running and Debugging Your Program🔗
Even if you do not have actual hardware at hand, you can still use the built-in simulator to step through your code:
1. Select the Simulator: Ensure the project settings choose “Simulator” as the DebugDebugging and Troubleshooting Techniques with ICD and MPLAB XMaster real-time PIC microcontroller debugging with MPLAB X and ICD tools. Discover breakpoint setup, variable inspection, and performance techniques. Tool.
2. Start DebugDebugging and Troubleshooting Techniques with ICD and MPLAB XMaster real-time PIC microcontroller debugging with MPLAB X and ICD tools. Discover breakpoint setup, variable inspection, and performance techniques.: Click the DebugDebugging and Troubleshooting Techniques with ICD and MPLAB XMaster real-time PIC microcontroller debugging with MPLAB X and ICD tools. Discover breakpoint setup, variable inspection, and performance techniques. Project button (green play icon) or press F5. MPLAB X will build your code, then open the simulator debugDebugging and Troubleshooting Techniques with ICD and MPLAB XMaster real-time PIC microcontroller debugging with MPLAB X and ICD tools. Discover breakpoint setup, variable inspection, and performance techniques. environment.
3. Step Through Code: Use the Step Over (F8), Step Into (F7), and other debugDebugging and Troubleshooting Techniques with ICD and MPLAB XMaster real-time PIC microcontroller debugging with MPLAB X and ICD tools. Discover breakpoint setup, variable inspection, and performance techniques. controls to watch how the program counter moves through each line of code.
Note: The simulator will not replicate all hardware features, but it helps you test general logic and code flow before moving to a physical device.
Practical Tips and Recommendations🔗
- Keep Your Tools Updated
Periodically check for updates within MPLAB X to stay on top of the latest features and bug fixes for both the IDE and XC8 compiler.
- Use Project Templates
Once you have a well-structured project, consider creating or saving it as a template. This approach shortens setup time on future projects.
- Organize Your Code
Leverage logical folders and naming conventions for readability, especially as your projects grow.
- Check Compiler Documentation
The XC8 compiler user’s guide provides additional information on compiler-specific optimizations and pragmas suitable for microcontroller targets.
Conclusion🔗
Congratulations on setting up MPLAB X and the XC8 Compiler! You are now ready to compile, debug, and run code on PIC microcontrollersIntroduction to PIC: Exploring the Basics of Microcontroller ArchitectureExplore the core principles of PIC microcontroller architecture, including Harvard design, RISC processing, and efficient memory organization. using a straightforward C-based workflow. This essential skill will serve as the backbone for more involved projects, where you will integrate device-specific features and tailor solutions to your application needs.
With a functioning toolchain in place, you have a solid foundation to continue exploring the world of PIC development. Happy coding!
Author: Marcelo V. Souza - Engenheiro de Sistemas e Entusiasta em IoT e Desenvolvimento de Software, com foco em inovação tecnológica.
Tags
C programming
Compiler installation
Debugging
IDE setup
Microchip
MPLAB X
PIC microcontrollers
Project configuration
Simulator
XC8 Compiler
References🔗
- Microchip - Documentação oficial e guias de referência para PIC Microcontrollers: www.microchip.com
- Peatman, John B. - 'Design with PIC Microcontrollers': www.pearson.com
 11 months ago
 10 months ago
 10 months ago
 11 months ago
 11 months ago
 10 months ago
 13 months ago
 13 months ago
 13 months ago
 13 months ago
 13 months ago
 13 months ago
 12 months ago
 11 months ago
 11 months ago
 11 months ago
 11 months ago
 11 months ago
 11 months ago
 11 months ago
 11 months ago
 11 months ago
 10 months ago
 10 months ago
 10 months ago
 10 months ago
 10 months ago
 10 months ago