 10 months ago
Optimized PIC DFM Design for Scalable Manufacturing
From Bench to Mass Production: PIC Deployment Guide
In this tutorial, we will explore crucial considerations when taking a PIC-based project from the prototyping bench to final deployment. We will examine packaging options, production programming methods, and deployment strategies that ensure reliable mass production and field operation. By the end, you should have an understanding of how to select the right package, professionally program your PIC devices at scale, and deploy your product with confidence.
Packaging Options for PIC Microcontrollers🔗
Packaging is more than just a form factor. It affects your PCB layout, manufacturing process, assembly cost, and even the thermal performance of your system. Understanding the advantages and trade-offs of each package type is key to designing an efficient and cost-effective product.
Below is a table of some common packaging options and their primary characteristics:
| Package Type | Description | Pros | Cons |
|---|---|---|---|
| DIP (Dual In-line Package) | Through-hole package with leads extending from the sides. | Easy prototyping, hand-solder friendly, socket compatibility | Large footprint, less suitable for high-volume automation |
| SOIC (Small Outline IC) | Surface-mount package with gull-wing leads on each side. | Smaller footprint than DIP, better for automated assembly | Moderate difficulty for hand-soldering, limited pin count |
| QFN (Quad Flat No-Lead) | Flat package with contacts on the underside edges. | Very compact, good thermal and electrical performance | Requires careful PCB design, challenging manual assembly |
| TQFP (Thin Quad Flat Package) | Square surface-mount package with leads on each of the four sides. | Moderate footprint, easier to visually inspect leads | Pin pitch requires precise assembly, still relatively large |
| BGA (Ball Grid Array) | Solder balls arranged in a grid underneath the chip. | Extremely compact, excellent performance, suitable for high pin counts | Requires advanced PCB technology, complex rework |
Choosing the Right Package
1. Prototype Phase: If you are at the proof-of-concept or low-volume phase, a DIP or SOIC may be sufficient. These packages are easier to hand-solder and allow quick replacements or reprogramming.
2. Mid to High Volume Production: For more complex designs or higher volumes, packages like QFN, TQFP, or BGA become attractive. They reduce board space, can lower costs, and allow automation. However, they require careful PCB layout and factory capabilities such as reflow soldering with stricter tolerances.
3. Thermal and Electrical Requirements: Packages with exposed pads or advanced heat-dissipation features (like QFN or certain TQFP variants) help ensure stable operation in demanding conditions. Power dissipation is essential to evaluate for high-current or high-frequency Generating Audio with PIC Timers and PWMExplore how to configure PIC timers and PWM for audio signal generation, including hardware setup, duty cycle adjustments and simple tone creation. applications.
Production Programming🔗
Production programming is the step where each PIC MCU is programmed with the final firmware before shipment. The selection of a programming method can significantly affect production throughput, reliability, and cost.
In-Circuit Serial Programming (ICSP)
ICSP Hands-on Approach to In-Circuit Serial Programming (ICSP)Explore our comprehensive ICSP tutorial for PIC microcontrollers. Learn essential wiring, configuration, and programming steps for swift development. is widely used for PIC microcontrollers
 Introduction to PIC: Exploring the Basics of Microcontroller ArchitectureExplore the core principles of PIC microcontroller architecture, including Harvard design, RISC processing, and efficient memory organization.. It allows you to program the device while it is already installed on the PCB. Key points include:
- Minimal Additional Pins: ICSPHands-on Approach to In-Circuit Serial Programming (ICSP)Explore our comprehensive ICSP tutorial for PIC microcontrollers. Learn essential wiring, configuration, and programming steps for swift development. typically uses a small set of pins (e.g., MCLR, PGD, PGC, and VDD/VSS).
- Programming Jigs or Connectors: Production lines often use beds-of-nails or pogo pin fixtures that contact test pads on the PCB. This eliminates the need for bulky connectors.
- Efficiency: Automated systems can program multiple boards simultaneously, reducing lead time.
Off-Board Programming
Off-board programming involves programming the microcontroller before placing it on the PCB. While this approach can simplify final testing (no extra programming step on the product line), it may complicate rework or firmware updates Creating a Custom Bootloader and Firmware Update SystemExplore a guide to designing a custom bootloader for PIC microcontrollers. Learn to manage firmware updates and memory partitioning for reliable booting. later.
- Advantages:
- No dedicated ICSPHands-on Approach to In-Circuit Serial Programming (ICSP)Explore our comprehensive ICSP tutorial for PIC microcontrollers. Learn essential wiring, configuration, and programming steps for swift development. pins on the production PCB.
- Pre-tested chips can be directly placed on the board.
- No dedicated ICSP
- Disadvantages:
- Handling and organizing pre-programmed devices is more complex.
- No easy in-system updates without additional hardware support.
Utilizing Bootloaders
A bootloaderCreating a Custom Bootloader and Firmware Update SystemExplore a guide to designing a custom bootloader for PIC microcontrollers. Learn to manage firmware updates and memory partitioning for reliable booting. is a small piece of code previously programmed into the PIC that allows firmware updatesCreating a Custom Bootloader and Firmware Update SystemExplore a guide to designing a custom bootloader for PIC microcontrollers. Learn to manage firmware updates and memory partitioning for reliable booting. via common communication interfaces (UART, USB, etc.).
- Field Updates: Enables firmware modifications or fixes after deployment via a simple serial, USB, or other interface.
- Combined with ICSPHands-on Approach to In-Circuit Serial Programming (ICSP)Explore our comprehensive ICSP tutorial for PIC microcontrollers. Learn essential wiring, configuration, and programming steps for swift development.: Many designers use ICSP for initial flashing of the bootloader and rely on the bootloaderCreating a Custom Bootloader and Firmware Update SystemExplore a guide to designing a custom bootloader for PIC microcontrollers. Learn to manage firmware updates and memory partitioning for reliable booting. for subsequent updates.
Deployment Strategies🔗
Once programming methods are set, the next challenge is deploying your product in a way that meets performance, regulatory, and logistical requirements.
Final Assembly and Quality Checks
Before sealing up devices and shipping them out, thorough quality checks are vital. This ensures every module functions to specification. Common steps include:
1. Functional Testing: Automated test routines to verify the microcontroller’s I/O, communication channels, and any critical sensors Analog-to-Digital Conversion: Connecting Sensors to PICExplore our step-by-step PIC microcontroller ADC tutorial, including sensor interfacing techniques and C code examples to achieve accurate conversions. or displays.
2. Burn-In Testing (if necessary): Subject products to elevated temperatures Automated Greenhouse Controller with PIC and SensorsLearn to build an automated greenhouse controller using a PIC microcontroller with sensors to manage temperature, humidity, and irrigation. and operating conditions to catch early-life failures.
3. Firmware Verification: Validate that the correct firmware version is programmed and that configuration bits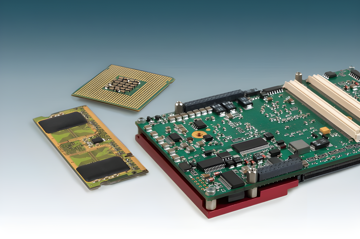 Using Configuration Bits to Customize Your PIC ProjectDiscover how to set PIC microcontroller configuration bits. Learn key steps for oscillator, watchdog, and code protection to ensure reliable startup. match the intended design.
Storage and Shipping Preparations
Even inactive devices can be affected by electrostatic discharge (ESD) and humidityAutomated Greenhouse Controller with PIC and SensorsLearn to build an automated greenhouse controller using a PIC microcontroller with sensors to manage temperature, humidity, and irrigation..
- Packaging: Use anti-static materials and, if needed, moisture barrier bags (particularly for moisture-sensitive package types like QFN and BGA).
- Labeling: Maintain traceability by labeling each device or batch with information such as firmware version, production date, and serial numbers.
- Inventory Control: Track batch numbers and use software-based inventory systems to manage shipments and simplify recall or firmware updateCreating a Custom Bootloader and Firmware Update SystemExplore a guide to designing a custom bootloader for PIC microcontrollers. Learn to manage firmware updates and memory partitioning for reliable booting. campaigns if required.
Field Updates and Maintenance
Many modern systems require ongoing firmware updatesCreating a Custom Bootloader and Firmware Update SystemExplore a guide to designing a custom bootloader for PIC microcontrollers. Learn to manage firmware updates and memory partitioning for reliable booting. after deployment. This capability can be approached in various ways:
- Remote or Over-The-Air (OTA) Updates: If your product includes wireless connectivity, an OTA update strategy can simplify post-deployment maintenance.
- Physical Access: In some industrial environments, a serial or USB port with the bootloaderCreating a Custom Bootloader and Firmware Update SystemExplore a guide to designing a custom bootloader for PIC microcontrollers. Learn to manage firmware updates and memory partitioning for reliable booting. can be sufficient.
- Security Considerations: Always implement necessary authentication or encryption to prevent unauthorized firmware modifications.
Best Practices🔗
1. Design for Testing: Include test points or dedicated headers for easy programming and troubleshooting. Well-thought-out test strategies reduce issues on the production line.
2. Optimize Layout: Proper layout for your package type ensures reliable manufacturing. Pay close attention to decoupling capacitors, signal integrity, and ground planes.
3. Document Thoroughly: Provide manufacturers with clear assembly instructions, programming steps, and acceptance criteria. Good documentation prevents costly rework.
4. Plan for Scale: Even if you start small, design your PCBs, fixtures, and tooling to accommodate increasing volumes in the future. This approach can significantly reduce the per-unit cost over time.
Conclusion🔗
Taking a PIC-based design from the bench to a finished product involves a careful balance of package selection, production programming, and deployment planning. By identifying the most suitable packages for your application, setting up robust production programming workflows, and ensuring a clear deployment strategy, you lay the groundwork for a streamlined path to mass production. Proper testing, documentation, and design considerations will help ensure consistent, high-quality results for any PIC-focused project.
With a clear understanding of these strategies, you are prepared to handle the practical challenges of deploying PIC microcontrollersIntroduction to PIC: Exploring the Basics of Microcontroller ArchitectureExplore the core principles of PIC microcontroller architecture, including Harvard design, RISC processing, and efficient memory organization. at scale-whether for a small run of specialized devices or a large commercial product.
Author: Marcelo V. Souza - Engenheiro de Sistemas e Entusiasta em IoT e Desenvolvimento de Software, com foco em inovação tecnológica.
Tags
Bootloader
Deployment strategies
Field updates
ICSP
Mass production
Packaging options
PCB layout
PIC microcontrollers
Production programming
Quality checks
References🔗
- Microchip: www.microchip.com
- Microchip Developer Help: microchipdeveloper.com/
 10 months ago
 11 months ago
 10 months ago
 10 months ago
 10 months ago
 10 months ago
 10 months ago
 10 months ago
 10 months ago
 10 months ago
 10 months ago
 10 months ago
 10 months ago
 10 months ago
 10 months ago
 10 months ago