Effective PIC Debugging: MPLAB X & ICD Integration
ICSP Insights: Programming PICs On-Board Efficiently
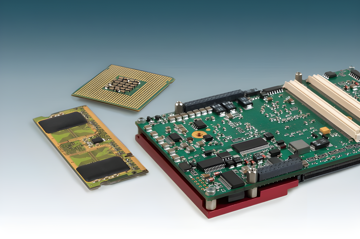
In-circuit serial programming (ICSP) is a technique that allows you to program and reprogram a PIC microcontroller directly on your target board. This eliminates the need to remove the microcontroller from its circuit, providing a more seamless and rapid development cycle. In this tutorial, we will explore how ICSP works, the hardware connections required, and the practical steps for programming a PIC microcontroller Introduction to PIC: Exploring the Basics of Microcontroller ArchitectureExplore the core principles of PIC microcontroller architecture, including Harvard design, RISC processing, and efficient memory organization. using ICSP.
Understanding the Concept of ICSP🔗
At its core, ICSP leverages a simple serial protocol-typically involving a clock and data line-to transfer a firmware image from a programming tool into a PIC microcontrollerIntroduction to PIC: Exploring the Basics of Microcontroller ArchitectureExplore the core principles of PIC microcontroller architecture, including Harvard design, RISC processing, and efficient memory organization.’s program memory. Because the microcontroller can remain on the board and connected to other components, ICSP greatly speeds up the development process. It is also used in production environments, where a dedicated programming header is often included on the PCB.
Some key points about ICSP:
- Eliminates the need to physically remove the MCU for programming.
- Supports erase, write, and verify operations in a streamlined workflow.
- Allows rapid iteration during software development and hardware debugging
 Debugging and Troubleshooting Techniques with ICD and MPLAB XMaster real-time PIC microcontroller debugging with MPLAB X and ICD tools. Discover breakpoint setup, variable inspection, and performance techniques..
Basic Hardware Requirements🔗
To perform ICSP, you generally need:
1. A PIC microcontrollerIntroduction to PIC: Exploring the Basics of Microcontroller ArchitectureExplore the core principles of PIC microcontroller architecture, including Harvard design, RISC processing, and efficient memory organization. with ICSP capability.
2. A programmer/debugger such as a PICkit™ or an MPLAB® ICD tool.
3. An ICSP header or dedicated pads on your PCB.
4. Support circuitry (pull-up resistor on MCLR, decoupling capacitors, stable power supply).
The minimal wiring connections for ICSP typically include:
- MCLR/VPP: Programming voltage pin (also serves as master clear/reset).
- PGC: Programming clock line.
- PGD: Programming data line.
- VDD: Power supply.
- VSS: Ground reference.
Below is a common pin assignment table for ICSP:
| Pin | Function | Notes |
|---|---|---|
| MCLR | Programming Voltage | Also the reset pin of the PIC. |
| PGC | Serial Clock (PGC) | Sometimes labeled ICSPCLK or RB6. |
| PGD | Serial Data (PGD) | Sometimes labeled ICSPDAT or RB7. |
| VDD | Power Supply | Typically 5V or 3.3V depending on MCU. |
| VSS | Ground | Common reference for signals. |
This set of signals is often provided in a 5-pin or 6-pin header on development boards. Many Microchip development boards and custom PCBs use a 6-pin connector, adding a key or No Connect pin for alignment.
Typical Circuit Connections🔗
Below is a high-level diagram (in Mermaid) showing the programmer connected to the target PIC via ICSP:
flowchart LR
A[Programmer] ---|PGD| B((PIC Microcontroller))
A ---|PGC| B
A ---|MCLR(VPP)| B
A ---|VDD| B
A ---|VSS| B
In practice, you will connect the lines from your programming tool to the corresponding pins on your PIC and ensure that:
1. MCLR has a pull-up resistor to VDD (often 10kΩ).
2. The supply voltage VDD is stable and within the recommended range for your PIC.
3. Proper decoupling capacitors are placed near the PIC’s power pins.
4. The MCU is in a state that allows programming (e.g., not driving conflicting signals).
Step-by-Step ICSP Procedure🔗
A practical hands-on workflow for ICSP typically consists of:
1. Prepare the Hardware
- Ensure your PIC circuit is powered correctly (VDD and VSS).
- Attach the programmer’s ICSP cord to the matching header or pins on the target board.
- Confirm that MCLR, PGC, and PGD match the correct pins on the microcontroller.
2. Configure the Programmer
- Most tools, such as PICkit or ICD, interface seamlessly with MPLAB X
 Getting Started with MPLAB X and the XC8 CompilerSet up MPLAB X IDE and XC8 compiler for PIC programming with our comprehensive guide detailing installation, configuration, and debugging techniques. or you can use MPLAB IPE (Integrated Programming Environment).
 - Select the correct Device in the programming software so the tool knows how to handle your specific PIC model.
3. Erase/Check Device
- Perform an Erase if required or let the software automatically handle this during programming.
- Check the Device ID to ensure you are connected to the correct target.
4. Program and Verify
- Load your hex file into the programming tool.
- Click Program and the software will write your firmware to the PIC’s memory via PGC and PGD.
- A final Verify step confirms that the code was correctly written.
5. Test Your Application
- After a successful program and verify sequence, your PIC should immediately run the new firmware if the configuration bits
 Using Configuration Bits to Customize Your PIC ProjectDiscover how to set PIC microcontroller configuration bits. Learn key steps for oscillator, watchdog, and code protection to ensure reliable startup. are set correctly for normal operation.
 - DebugDebugging and Troubleshooting Techniques with ICD and MPLAB XMaster real-time PIC microcontroller debugging with MPLAB X and ICD tools. Discover breakpoint setup, variable inspection, and performance techniques. or iterate as needed-ICSP lets you do this quickly without removing the device from the board.
Practical Tips and Best Practices🔗
- Keep ICSP pins accessible: When you design your board, reserve a straightforward header or test pads for these signals.
- Avoid conflicts: If you have peripheral components on the PGC/PGD pins, consider adding jumpers or series resistors to avoid interference during programming.
- Cable length: Keep the cable between your programmer and target as short as possible to reduce noise and signal integrity issues.
- Verification: Always verify after programming. This ensures that any potential bit errors are caught before you run your application.
Conclusion🔗
A hands-on approach to ICSP not only saves development time, but also brings flexibility and scalability to your embedded projects. By providing a simple header or connector for the programmer, you can reprogram the PIC microcontrollerIntroduction to PIC: Exploring the Basics of Microcontroller ArchitectureExplore the core principles of PIC microcontroller architecture, including Harvard design, RISC processing, and efficient memory organization. on the fly, making firmware updates and debugging more efficient. As you move on to more sophisticated applications, ICSP remains a reliable and indispensable tool-enabling you to streamline both prototyping and production programming in your engineering endeavors.
Key Takeaway: By carefully wiring the MCLR, PGC, PGD, VDD, and VSS signals, along with proper hardware design and software configuration, you can turn any PIC board into a reprogrammable platform. This hands-on technique is vital for rapid iteration, debugDebugging and Troubleshooting Techniques with ICD and MPLAB XMaster real-time PIC microcontroller debugging with MPLAB X and ICD tools. Discover breakpoint setup, variable inspection, and performance techniques., and final deployment in both hobbyist and professional settings.
Author: Marcelo V. Souza - Engenheiro de Sistemas e Entusiasta em IoT e Desenvolvimento de Software, com foco em inovação tecnológica.
Tags
Circuit design
Debugging
Embedded systems
Firmware
Hardware
ICSP
MPLAB
PIC microcontroller
PICkit
Programming
References🔗
- Microchip: www.microchip.com
- Microchip Developer Help: microchipdeveloper.com/
 11 months ago
 11 months ago
 11 months ago
 13 months ago
 13 months ago
 13 months ago
 13 months ago
 13 months ago
 13 months ago
 13 months ago
 12 months ago
 11 months ago
 11 months ago
 11 months ago
 11 months ago
 10 months ago
 10 months ago
 10 months ago
 10 months ago
 10 months ago
 12 months ago
 10 months ago
 13 months ago
 13 months ago
 10 months ago
 10 months ago